How To Record Screen On Your iPhone: The Easiest Guide
Have you ever wanted to record your game? Or make an iPhone how-to tutorial, or maybe save a portion of a live stream? Fortunately, iOS includes a new control center feature that allows you to record what you're doing on your screen.
Knowing how to record your iPhone screen has a variety of applications, ranging from practical to entertaining. For example, if you're trying to show a friend or family member how to use an iPhone feature, a screen recording provides a handy visual representation of what to do.
However, Apple made the screen recording a simple process. But still, if you’re struggling to record your screen on iPhone, check out this article to find out the most accessible guide to record screen on iPhone.
Table Of Contents
- What Is Screen Recording Feature?
- How Long Can You Record A Screen?
- What Are The Benefits Of Screen Recording?
- How To Record The Screen On iPhone
- Wrapping Up
TLDR
- A screen recording is when you record a video of what's happening on your device's screen. You can perform screen recording with a built-in feature or any software.
- Screen recording has several significant advantages. Many free screen recording platforms allow you to record indefinitely.
- Fortunately, the screen recording process is as simple as pressing a button. But first, you must add the screen record option to your iPhone's Control Center for easy access.
What Is Screen Recording Feature?
Screen recording allows you to record what is happening on your screen for later viewing. Capturing what happens on your screen can be helpful for a variety of purposes.
Whether you're watching a presentation or webinar that you'd like to watch again or creating a video game tutor, you can do that with the screen recording feature.
When it comes to using the screen recording feature, you can use the built-in feature of the device or download a tool for it.
How Long Can You Record A Screen?
You can screen record endlessly with the right screen recording software. You can continue to capture the action as long as it is visible on your screen. However, this does not always imply that you can record hours and hours of footage. Consider the following:
1. The file size
Large files are complicated, difficult to send, and challenging to store. The longer you record your screen, the larger your file will be, which may cause issues with future playback.
2. Resolution
Depending on the settings on your monitor and video recorder, you can record your screen in various resolutions. If you record your screen at a high resolution, you may notice that your file size grows more quickly.
3. Storage space
How much information can you store? Some free screen recording software limits the file size you can save to the platform. In other cases, your storage solution's limitations may limit your recording.
Before you begin recording, check the specific limitations of your screen recording software. Make sure you have a backup solution in place to allow you to continue capturing your screen for as long as you need.
What Are The Benefits Of Screen Recording?
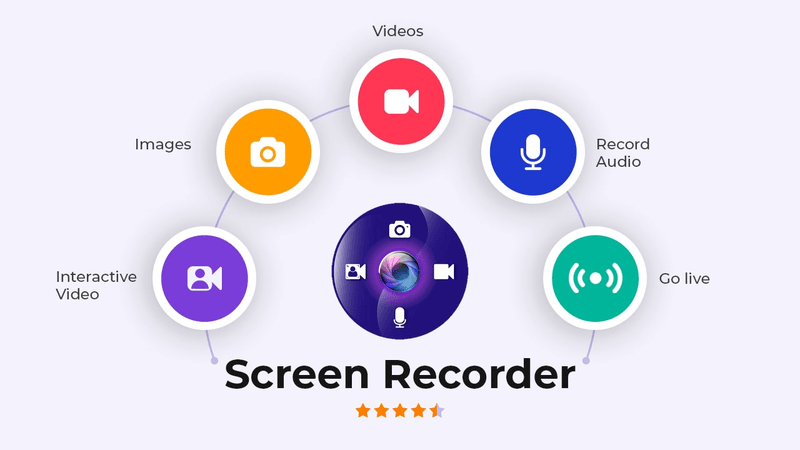
There is a variety of benefits of screen recording. Here are some benefits of screen recording that you might consider:
Show A Procedure Clearly
When your mother calls to remind you how to post a video to Instagram, you will walk her through it. But, instead, you are going to record yourself doing it and send it to her.
Then, when she forgets, she can just watch the video.
You can also use screen recording to assist a customer who has contacted your support team with a software question. You can help a colleague who is learning a new process and a variety of other situations.
Record A Software Bug
When you face an error or a bug in the app you're using; you sometimes find it difficult to describe what you were doing at the time. You no longer have to do this now.
Instead, you can record a video of what you're doing when the error occurs and send it to the app's creator to assist them. So, they can determine what's wrong.
This is also beneficial to your internal development team. For example, if you're working on an iOS app with a group, screen recordings can be a great way to show the rest of your team what's going on to get that fix it out as soon as possible.
Show Off New App Features Or Functionality
Whether you've developed a new app or simply updated an existing one, video is an excellent way to demonstrate the features you're most proud of.
You can do a series of short videos highlighting individual features or a more detailed version. In either case, you can demonstrate how your app works.
Furthermore, iOS's ability to capture voiceover allows you to explain what you're doing.
Provide Feedback
The new screen recording feature in iOS allows you to do even more. You can now review documents and images and provide feedback from almost anywhere.
You can record your thoughts and changes while reviewing instead of typing them out in an email or text. Then, whether you record narration or let the visuals speak for themselves, you can be confident that your recipient will understand precisely what you mean.
Make A Video Of Yourself Playing A Game
Do you want to share your victories with the rest of the world? You can screen record and show people how you play a game.
So, now that you know why you'd want to record your device's screen, it's time to learn how.
How To Record The Screen On iPhone
Screen recording was introduced in iOS 11. So, you'll need that version or later to capture what's happening on your iPhone screen. That's not a problem, because the most recent version of Apple's phone software, iOS 15, can even run on 2015 devices.
In the upcoming sections, we have described how to screen record on different versions of the iPhone:
Turn On Screen Recording
The first step is to turn on the screen recording on your device. Screen recording on your iPhone is simple, but it is not automatically configured to record out of the box.
Before you can begin screen recording on your iPhone, you must first enable or configure the screen recording feature. If you have an iPhone from a generation after the iPhone 6, you must first ensure that your iOS is up to date to iOS 14. So after that, simply follow the steps below to enable screen recording on your iPhone.
1. Go to Settings.
2. Open Control Center.
3. Tap Customize Controls. If the Access Within Apps switches is not enabled (green), tap to enable it.
4. Now scroll and find the Screen Recording option.
5. Tap on the plus sign next to it. You’ll now see the Screen Recording option move to the Include section.
Record Screen On iPhone X, XR, 11, 12
Once you are done enabling the screen record function on your iPhone, it’s really simple to record your screen.
Let’s see how you can screen record on all variants of iPhone X, XR, 11, and 12:
1. Open the iPhone control center and tap the Screen Record icon.
2. Allow 3 seconds for the recording to begin. That's all. Everything on your screen will now be recorded.
3. Tap the red status bar at the top left of your screen to stop recording. Then press the Stop button. Your recorded video is saved to your photos automatically. You can also open the Control Center by swiping down. Then tap the record button again to stop recording your screen.
Record Screen On iPhone SE, 6s, 7, 8
If you want to screen record on an older generation iPhone because you might have an older version of iOS.
In case you have iOS 11 or 12 and are using iPhone SE, iPhone 6 or 6s, iPhone 7 or iPhone 8, here’s how you can record your screen.
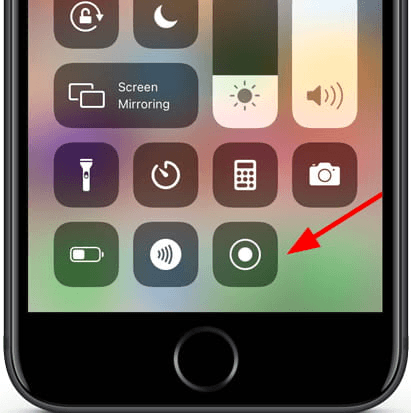
1. Open the iPhone control center and tap the Screen Record icon.
2. Wait 3 seconds for the recording to begin. That's all there is to it. You will now be recording everything on your screen.
3. To stop recording, tap the red status bar at the top of your screen. Press the Stop button. You'll see a notification that your video has been saved to your photos. To view your video, tap this notification. You can also open the Control Center and tap the record button again.
Record Screen With Sound On An iPhone
When you record your screen, audio from your iPhone is automatically recorded. You can include a voice-over or narration with just one simple setting in your recording. Let's look at how to screen record with sound on an iPhone.
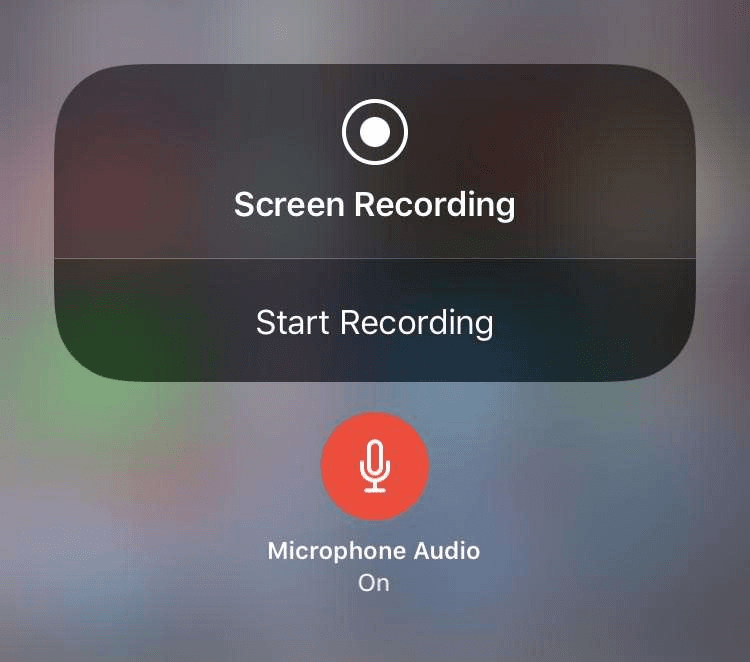
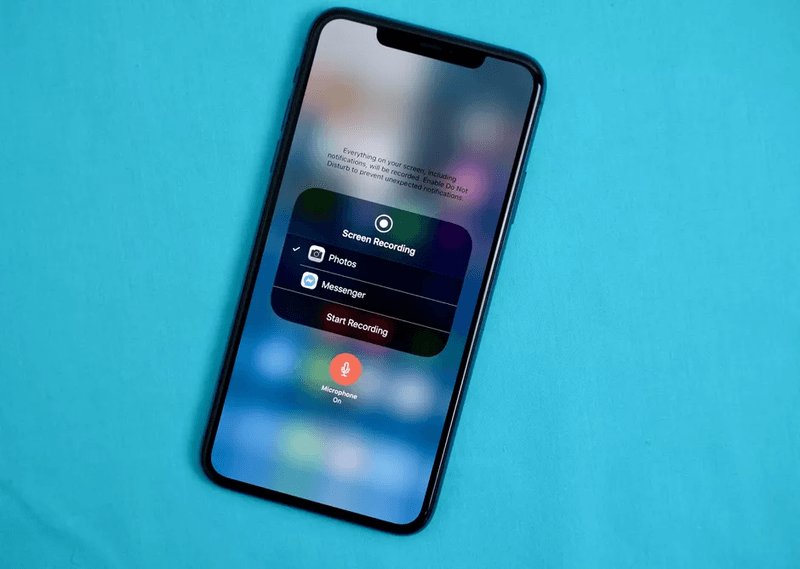
1. Open the control center by swiping down (or up, depending on your iOS) from the top-right corner of your iPhone and long-pressing the Screen Record icon.
2. Select the microphone icon. It'll turn red. Then, press the Start Recording button.
You are now recording both your screen and audio. Begin speaking along with it to record a how-to video or any other type of video you want.
3. To stop recording, tap the red status bar in the upper left corner of your screen select Stop. Your recorded video is saved to your photos automatically. To stop recording your screen, open the Control Center and tap the record button again.
Wrapping Up
By now, you already know the advantages of screen recording your device.
Now that you've grasped the concept of screen recording on your iPhone, are you looking to personalize it? If you are, then VideoSends can be the perfect solution for you.
VideoSends is the easiest screen recording software to record anything on any device. In addition, it allows you to customize the video and share it within seconds.
So, what are you waiting for? Sign Up now to quickly record your video, edit, and share instantly!