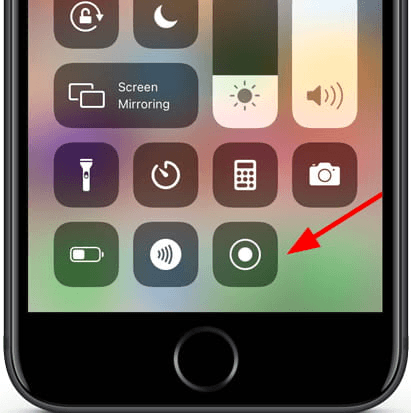
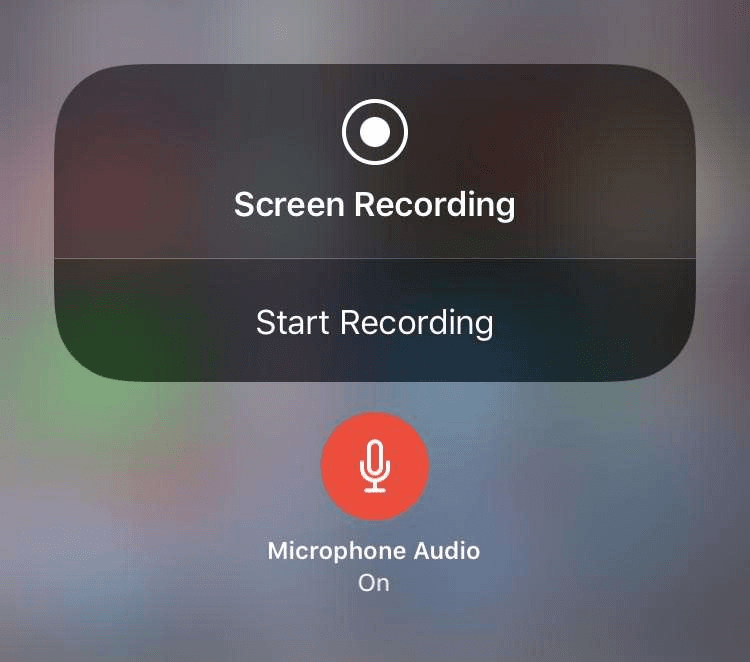
Why Can't I Screen Record? - The Possible Solutions

Whether you are a YouTuber or a professional, screen recording is essential nowadays. This is because you can get so much work done by screen recording!

laptop and girl

Be it online training, webinars, live streaming of games, online lectures, or product tutorials, screen recording comes as a savior.

Hence, when this feature doesn’t work, it creates a nuisance in our professional lives.

In this article, to ease your pain, we will talk about the odds of screen recording for android, android 11, and ios.

So without further ado, let’s begin.

Jump To Content-

TLDR

Why Can’t I Screen Record On My Laptop?

Your device may not allow you to screen record for a few reasons. The reasons are stated below-

gamer

Restriction On-Screen Recording

You will be unable to screen record if the phone manufacturer restricts the screen recording feature. It causes a permanent disability to your screen recording feature. Unfortunately, many manufacturers lock the screen recording and screenshot feature.

In this case, there is no other option for you to change the device if screen recording is crucial to you,

Restriction On-Screen Recording Due To Company Policy

If you own a laptop provided by your company or agency, they might choose to disable the screen recording feature on that phone. Some companies do that to protect their data.

Restriction On-Screen Posed By Certain Apps

Some apps, mainly banking or financial apps, disable screen recording and screenshot features by default. But the restriction is mostly on their app. It is done to secure users' private data.

How To Fix?

You can solve this issue by rooting your device. You can install some root-specific screen recording apps when you root your device. But you will need special permissions.

However, if your device has a restriction on on-screen recording because it's against your company policy, maybe it’s not a good idea to do this.

Besides, rooting requires an excellent understanding of development and troubleshooting. Therefore, our suggestion is to visit the IT department of your company if it's necessary.

Why Can’t I Screen Record On My Android 11?

The new version of Android, also known as Android 11, may come with many new features. One of them is Screen Recording. Indeed, it’s an exciting feature; however, unfortunately, many users cannot experience it.
android 11
Source: https://blog.google/products/android/android-11/

Some users of Android 11 are facing some troubles while screen recording, such as:

If you have encountered the same problems, try the solutions below to fix the issue.

Restart Your Android

This is an age-old technique to get rid of any kind of problem. While this has become meme material nowadays, restarting your device is helpful. It helps your device to get rid of some bugs. You can apply this to fix screen recording issues as well.

Check Requirements

While it sounds obvious, sometimes the lack of a proper build can hinder many functions. Since the Screen Recording option is available for Android 11, any lower version will not have this feature. You can check that by:

Following the correct procedure to record your screen is very important as well. You can only access your Android 11’s screen recorder from the Quick Settings option. These are the following steps to Screen Record on your Android Screen Properly-

Disable Force Desktop Mode

Desktop modes allow your device to connect to an external display. It provides the experience of using a desktop computer. When you enable Force Desktop Mode, you face audio and video issues on your screen. That’s why, while Screen Recording, you should disable Force Desktop Mode from your Settings. To do that-
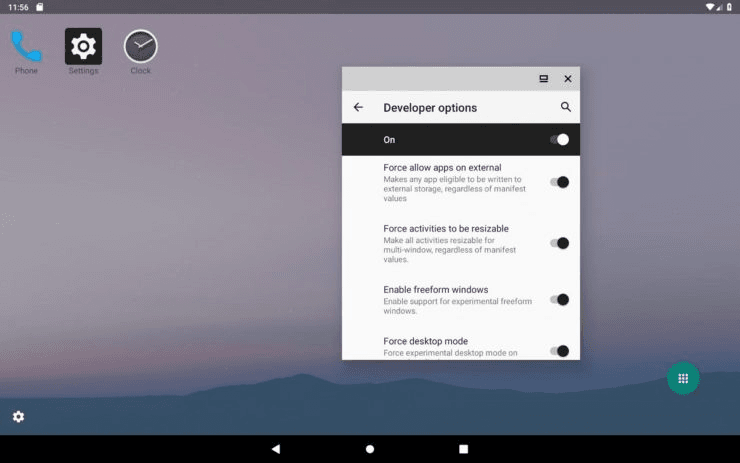
Disable Force Desktop Mode
Source: https://wccftech.com/

If you follow the steps accordingly, you will most likely screen record without issues.

Uninstall Third-Party Apps

Some third-party screen recording apps are harmful to your device and its operating system. Therefore, you should not install such apps if you have a default screen recording option.

If you have such apps, uninstall them and then restart your device. This solution was helpful for many android 11 users.

Re-enable Notch

If you modify some notch settings, it can pixelate or squish your screen recording videos. Instead of changing notch, go for making it default by following these steps-

Disconnect External Audio Devices

Suppose your device is connected to any external device such as Bluetooth speakers, earphones, or headphones during screen recording. In that case, that might be the reason why you are facing trouble while screen recording.

Disconnect the devices and go to Screen Recorder Audio Settings. Click Internal Audio. There, you are good to go.

Why Can’t I Screen Record On My iPhone?

Are you having trouble with saving your screen recording videos? Is the audio inaudible in your iPhone screen recording? Well, you are not the only one.

It turns out most people sometimes have trouble with screen recording on iPhones.

Apple first introduced screen recording in iOS11. This was an essential feature; hence users welcomed it. However, things can go wrong for many reasons.
lady and iphone

Let's go step by step to fix the screen recording issue on your iPhone.

Check Restrictions

If you see that your screen recording icon is greyed, it means the screen recording feature is restricted on your iPhone. To remove the restriction, go to the Settings option. Next, click on the Screen Time Option. After that, go to the Content Restrictions option.

After that, scroll down and go to the Game Center Section and enable screen recording to proceed. Now you have activated the Screen Recording icon in the Control Center.

Check Device Storage

You will not save your screen recording if your iOS device lacks storage. Check the storage limitation in the Settings option.

Deactivate Low Power Mode

Do you receive the “Screen recording failed to save” message every time you want to save your screen recording?

Well, that might happen if your phone is on Low Power Mode because this mode disables some features automatically.

Go to Settings, click on the Battery option and turn off Low Power Mode.

Upgrade Your iOS Version

Upgrading to the latest version might clear some glitches in your iOS or iPadOS. Because updating to the latest versions provides security updates.

To check if your iOS device is updated to the latest version, go to Settings, click on General, tap on Software Updates. Then, install the latest update if it is available.

Restriction From Developers

“Screen recording failed to save because of 5823.”

Looks familiar? Well, error 5823 in iOS indicates that the screen recording feature of your iOS has been copy-protected by its developers. This restriction is on certain apps. Hence, you cannot record content from that particular app. Unfortunately, there’s no solution to this kind of problem.

How Can I Screen Record On iPhone?

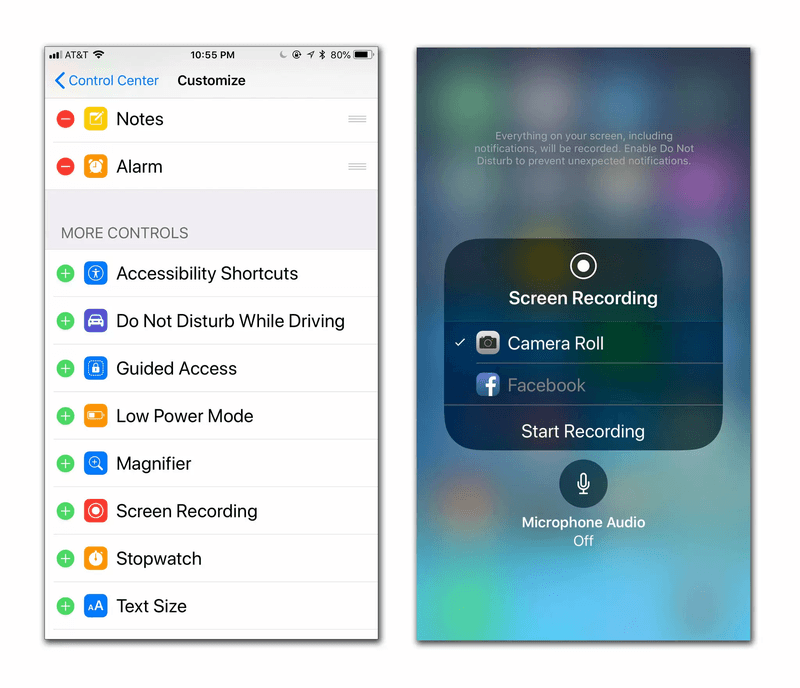
Here we have given the instructions for screen recording on iPhone 12.
screen record on iPhone
Source: https://thescribblershub.com/

Settings > Control Center > Screen recording.

Why Is There No Sound On My iPhone Screen Recording?

That’s because, by default, when you record your screen, the audio is not recorded. To enable audio, you can turn on the microphone.

Ta-da! You have enabled sound with your screen recording.

How Long Can I Screen Record on my iPhone?

This is a common question among users. Apple says you can screen record for endless time if you have

If your screen recording suddenly stops, it might indicate that your iPhone overheated itself.

What Are Some Good Screen Recording Tools?

Now that you know the solutions to Screen Recording problems, let’s check out some efficient Screen Recording software.

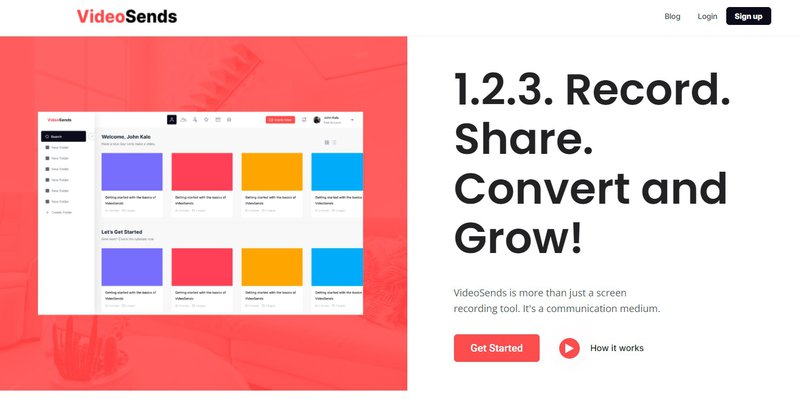
VideoSends

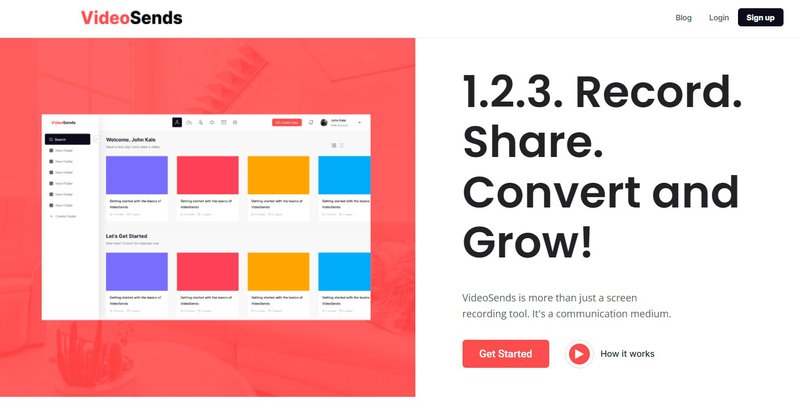
VideoSends is the most efficient software for screen recording. The software interface is user-friendly and will go perfectly with any video.
VideoSends HomePage Screenshot
Source: VideoSends

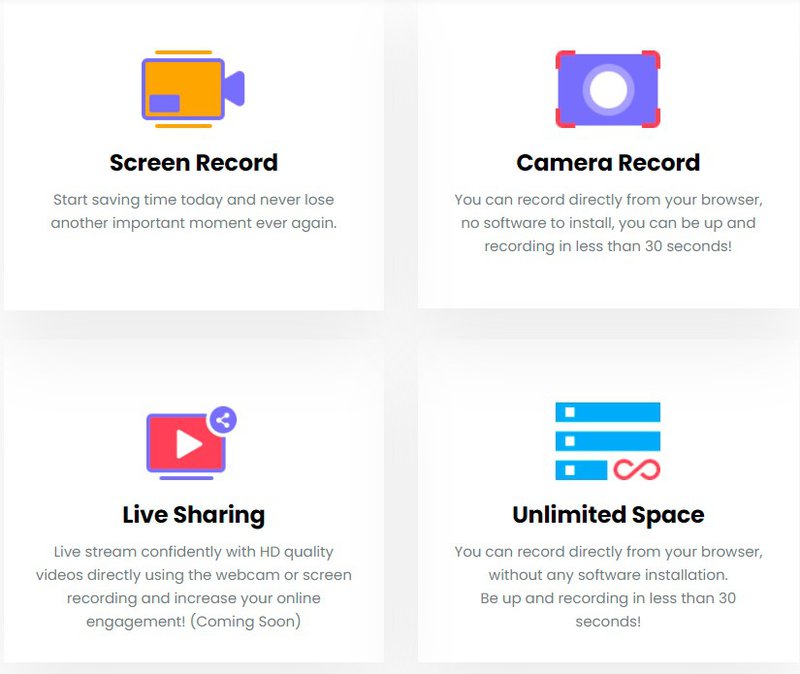
The software has a screen record and a camera record feature. Besides, you can do live stream your video for better engagement with the audience. The most exciting feature is that the software gives you unlimited storage to store your videos.

You can edit and personalize your videos according to your needs and share them from your device on any platform instantly.

Movavi

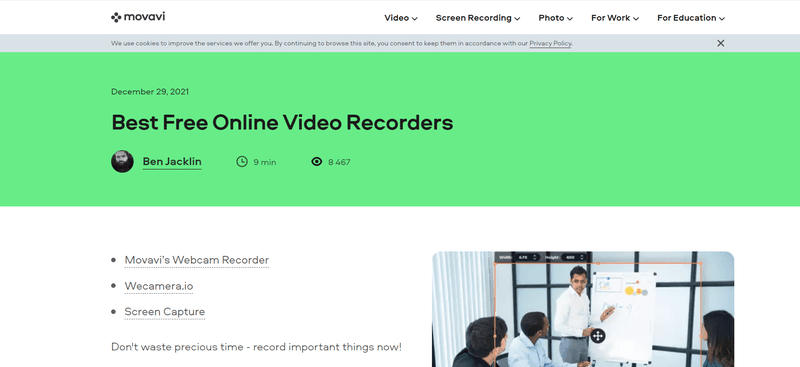
Movavi is an effortless Webcam Recorder. What makes the software stand out is that it gets along with significant browsers like Edge, Chrome, Opera, Firefox.
Movavi Home Page
Source: Movavi

ShareX

ShareX is another efficient screen recording tool. It gives some premium experience in the free version. The free version is available for only Windows and Linux.
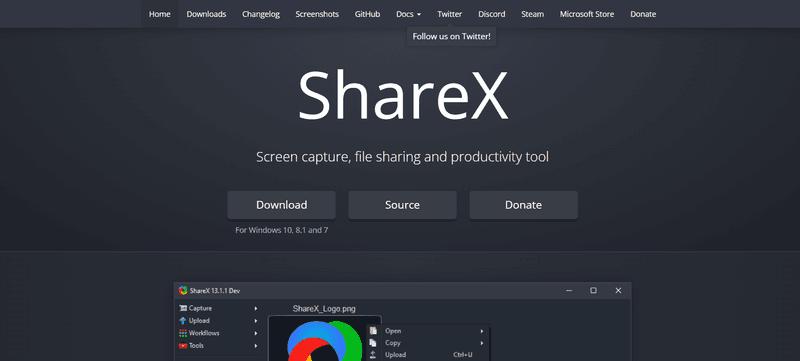
ShareX Home Page
Source: ShareX

ShareX users are allowed to save videos in several file formats. They can upload them on sites like Google Photos, Flickr, Twitter, etc. It also allows you to save recordings in GIF format.

Webcamera.io

Webcamera.io is popular software. It’s a versatile tool with outstanding performance. For example, you can take pictures to record webcam videos with audio with this software.
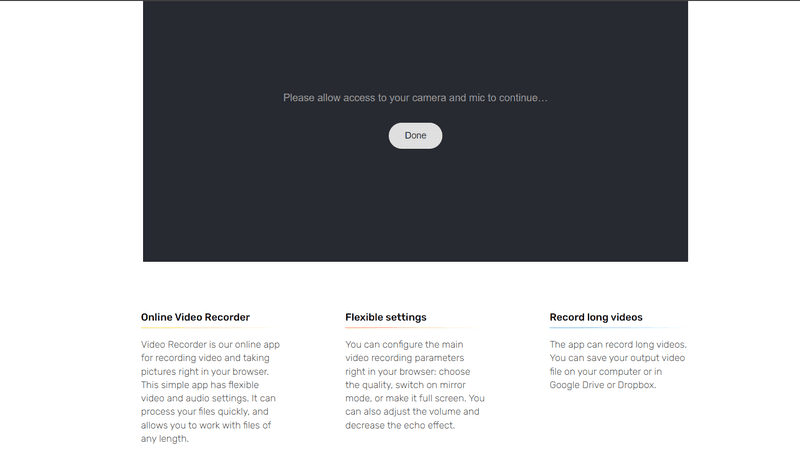
Webcamera.io
Source: Webcamera.io

You can save your work on your device or in Drive or Dropbox.

Clipchamp

Clipchamp is another top-notch, free online video recorder. You do not need to download or install the software. You can use the free tool and record unlimited 480p videos. However, to remove the watermark and high-quality recording, you will need to upgrade to the premium version.

Clipchamp Home Page
Source: Clipchamp

Clipchamp also has an editing option that lets you trim, rotate, merge your work along with saving them on your device or sharing them on social media.

Main Takeaways

I hope we can give you an insight into the solutions to the problems you face while screen recording. Now you need to select software that will meet your needs.

If you are still confused about choosing one, go with VideoSends. Subscribe to VideoSends and experience screen recording like never before!
How Long Can You Screen Record? The Odds Of Lengthy Videos

Ever seen YouTube channels of gamers where you can watch them play? Yes, that’s screen recording. Screen recording lets you capture your screen. Whether it is an online meeting or a class, screen recording gives you the opportunity of playback in the future.

Monitor and Speaker
Photo by Tommy Lopez from Pexels

The most obvious question that comes to people’s minds about screen recording is- how long can you screen record? Well, the answer depends on several variables.

In this article, you will learn-

TLDR

How Long Can You Screen Record?

There is a plethora of screen recording software. But all of them do not allow you to screen records for an indefinite time. However, if you pick the right software, it will capture your screen as long as you want.

gamer with headset
Photo by Yan Krukov from Pexels

However, these following factors can impede your screen recording-

File Size

Large files create several problems. Firstly they are very clunky; you will need a lot of storage space to store them. Likewise, they are challenging to transfer. These occurrences create problems for future playback.

Indeed you will find software that will let you record for endless time. But, think of it, can you post it on several social media platforms?

Platforms like YouTube’s let you post millennia-long videos. But there are platforms like Instagram that have a time restriction on videos.

Either way, you have to be aware of the time restrictions of your chosen platform and spend time behind editing and minimizing the video as much as possible.

Resolution

Resolution is a significant factor when it comes to screen recording. The resolution you want in your screen recording depends on the settings of your monitor and video recorder as well.

However, the high-resolution video takes up a lot of hardware storage space as the file size increases due to resolution.

Storage Limitations

The amount of data you can store on your hardware or the platform you are using for screen recording is something you should consider. If you are using free software, they will restrict your file size. However, even if you are not, you will face a storage limitation from your hardware.

Hence, to avoid these situations, be aware of your storage limitations and software restrictions before beginning your screen recording. It lets you be prepared and keep alternatives at hand.

However, if you are doing this for professional purposes, let’s say, if you are a YouTuber, never mess up with the resolution and file quality. That is never the option. Hence, it is better to subscribe to paid software and keep an eye out for your hardware space.

Software Limitations

Only free software restricts your time while screen capturing. The commercial software does not impose any restrictions. Instead, it gives a lot of other benefits. If you do not want to face such conditions, choose an efficient paid tool like VideoSends.

Editing for Conciseness

It is the hard part, editing. Ideally, after you screen record, you should edit your video. You should always research your audience and see what they love to gain better reach. Edit your videos for briefness and edit them for your audience. Take into account:

This is the most crucial thing to bear in mind. Your viewers have limited time to watch your videos. Hence, even if you get the privilege of screen capturing as long as you want, don’t do it.

Instead, break your video into two or three parts. In that way, your viewers will feel more connected with you. Besides, you will not lose their attention and make them watch it till the end.

Let’s say you are making a video game tutorial. Maybe you die one or two times before you finally succeed. Or perhaps while recording a webinar, there is a lot of dead space. You don’t need to bring those times when nothing takes place. Simply cut them out of your video.

Otherwise, your viewers will feel less attached to you, and boredom will take over. Moreover, it will extend your file size for no fruitful reason.

People nowadays watch videos on the go, on their phones. If your videos take more than a few seconds to load, people can shift their minds and watch something else instead.

The larger your file size is, the longer it will require to upload. This can cause you to lose your views and audience.

Does Mac Allow You To Screen Record With An External Camera?

Creatives have always favored Mac. Well, they have reasons. Mac allows you to do more creative stuff, especially with videos.

macbook
Photo by Anna Shvets from Pexels

Whether it is a video for social media, feature film, or a home movie Mac provides benefits that you can utilize and create professional visuals.

There are different ways of screen recording on Mac. You can use their built-in features or go for screen recording using an external camera.

Capture Your Screen Faster With VideoSends!

VideoSends is a fantastic screen recording software that can be used for professional and personal purposes. You can directly add your team members and work together from different places. Moreover, the interface is user-friendly; hence, your teammates will quickly get hold of it.

screenshot
Source: VideoSends

The software also lets you live stream. Therefore, your audience gets to communicate with you in real-time.

screenshot videosends
Source: VideoSends

The editing process is a piece of cake. Besides, you get to share the videos directly from the software after editing. This lets you build a social media community in no time. Let’s take a look at the features and downside of this software-

Features:

Downside

Still not sure if you should sign up? Well, the accessible version of VideoSends lets you create up to 25 five-minute videos. So, what’s the loss? Subscribe today and engage with your audience with amazing videos.

How To Screen Record On FaceTime With Sound- A Complete Guide

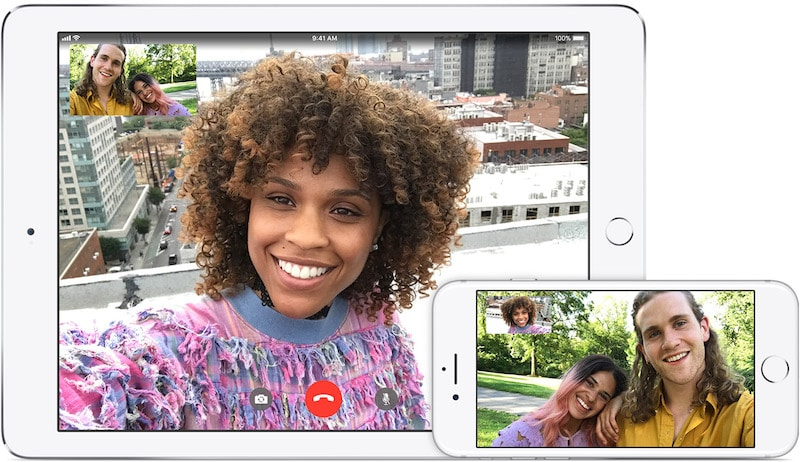
It is no surprise that FaceTime has revolutionized how we choose to communicate. Though it can take some practice to operate the app on different interfaces on different devices, its applications have found a way to exceed expectations. On such aspect can be screen recording the FaceTime calls. If you are also looking to hold on to those precious moments with your family away or document an important meeting, screen recording is your answer. You might struggle with how to screen record on FaceTime with sound. We have your back! The article covers a complete guide to help you guide through this process on multiple device interfaces. With just a few simple steps, you will have this skill up your sleeve too!

Screen Record On FaceTime: How To Record Screen With Audio?

Table Of Contents

What's The Fuss of Screen Recording on FaceTime?

TLDR

You might be wondering what might be the cause of screen recording on facetime. However, its uses can be pretty far-reaching.

Why might you want to screen record on facetime?

Keeping privacy concerns in mind, Apple does not offer an integrated recording software for screen recording on FaceTime. But that doesn't mean you can't find a workaround. Since its inception, the iOS feature has served multiple purposes to users. Mo over, FaceTime serves as an exceptional tool to support professionals in their everyday interactions.

Hence, to summarize, FaceTime call recordings can be necessary for the following instances:

How To Screen Record on FaceTime With Sound: Mac Users

Best for screening group calls, owing to the large display. Mac users experience a high-definition video. Furthermore, the int face is extremely intuitive and quite easy to understand., Therefore, making the screen record on FaceTime easier than with an iPhone or iPad.

How to screen record on FaceTime for Mac Users.

We have broken down the process into simple steps to answer the question: How to screen record on FaceTime with audio. With this guide, you should record the audio from a desktop or even the mic, if you will.

Interestingly, the Mac Mojave and Catalina versions are often embedded with the integrated tool that allows screen recording. Let’s take a quick look at how you can put the internal recording system in use.

Screen Recording On FaceTime UsingMac'ss Internal Recording Feature

  1. First, boot up the system, and launch the screenshot feature. Next, click Cmd+Shift+5, which will prompt the control center to appear at the bottom of your screen.
  2. The control center houses different options, including screen capture and full-screen recording. In addition, it gives you the autonomy to select any specific screen portion or the entire screen.
  3. In case you have multiple screen setups, avoid pressing the record button. Instead, press and hold the record button that will allow you to select your desired screen.
  4. Moreover, Mojave and Catalina resolve the screen record on FaceTie with sound. These versions let you record one particular window. You don't have to worry about the audio. Capturing the screen, first, open FaceTime. Then, hit the second icon from the capture tool control center.
  5. Now that you are set tap on the"Options” button. Hence, you will find a list of additional options from the dropdown tool. Therefore, enabling the audio or mic, you can record the sound.
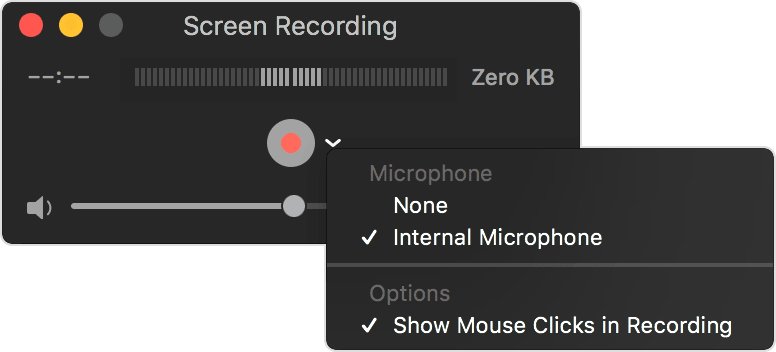
  6. Choose the Built-in Microphone choice. Keep in mind if you don't check this option, your video will be recorded without sound.
  7. Hit the "Record" button, and your screen recording is underway. On the top, you will see a small "x" button appear. If you want to stop the recording, press this button. However, if you don't want to use a mouse, press shortcut Cmd+Shift+5 again. Then it will get you a top key right in the control center.
  8. Over and out. Now you can find your recorded session in your Film/Movies Stack. You can easily access the location from your Desktop.

Record FaceTime Video and Sound with QuickTime

If you do not have the application available on your Mac's Menu Bar, a simple alternative can be to record FaceTime videos with QuickTime.

Record FaceTime Video and Sound with QuickTime
Image From: supportapple.com
  1. If you don't have the app in your Menu Bar, you must press the Cmd+Space bar. It'll launch the search box, where you will need to enter QuickTime Player.
  2. Hit Enter and a new dialog box will appear. Press Cancel. On the Taskbar, you will need to click on the File tab. It'll give you a drop-down menu to click on New Screen Recording.
  3. A compact dashboard will appear up where you will get a record button. Now if you want to record the full screen, hit the red button and click anywhere on the screen.
  4. However, if you want to record just a particular section of the screen, you can always use your mouse to make a selection. QuickTime Player will only record that particular section of the desktop.
  5. To ensure that the audio is recorded, click on the arrow right next to the recording button.
  6. Launch FaceTime and make the call. Once done, you will need to press the Stop button on the Taskbar.
  7. Once stopped, a new dialog box will prompt you to name the file and select the path where you want to save it.

How To Screen Record On FaceTime With Sound On iPhones?

The user frequency of iPhone and iPad is greater than Mac users. Though Apple offers a built-in screen recorder for versions of iOS 11 and later, the tool is yet to offer a smooth customer experience. Despite the flawless screen recording feature, the tool faces disruption when recording the video with sound. Moreover, this recording tool fails to record sound for multiple applications, including FaceTime.

So, does that mean you can't screen record on FaceTime from your iPhones? We have tried to cover everything to learn how to screen record on FaceTime with sound if you are an iPhone user.

Black iPhone with headphones ready for screen recording on facetime with audio.

Prep Time

With iPhones, you have to do a quick prep before starting the actual process This includes getting the record button in your iPhone's control center. To enable this,

  1. First, visit your Settings app and find the Control Center tab below. Next, press on the Control Center button, and you will find a tab to "Customize Controls."
  2. Now you have the entire list of available tools and applications that you can choose to add to your iPhone's control center. You can also remove the ones by tapping the (-) button next to the apps. And the screen recording feature by pressing the green (+) icon next to it. Sitch back to your Home Screen, and we shall look at the process itself.

Steps: How To Screen Record On FaceTime With Audio?

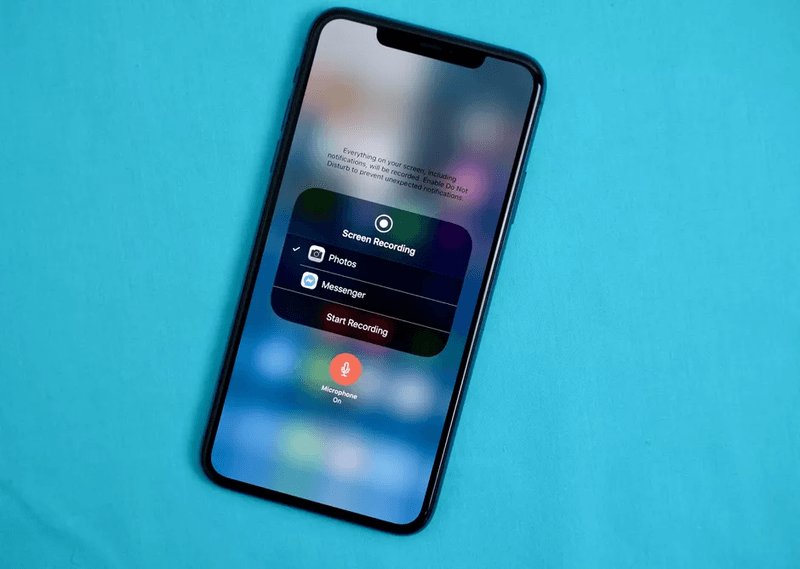
  1. Launch the Control Center by swiping it down from the top-right of your home screen. The Control Center shall show you the Screen Recording button with a white circle icon.
  2. Tap on this icon. This will prompt a 3-second timer for you to prepare. You will see the white circle will turn to a red indicator on the top left, showing that your screen recording has started.
  3. Open FaceTime and start the call. The screen shall start recording immediately. To stop the recording, hit the Control Center open, and tap the screen recording button again. Your recording will be stored in the Photos app.
  4. You need to follow an additional step for screen records on FaceTime with sound. First, press and hold the screen recording button to find the icon from the control center. This prompts you the option to turn on your microphone.
  5. Similarly, as you tap the icon, it will turn red. Hit start recording, and your video will be recorded with the sound from your microphone.

Note that the tool may sometimes not function smoothly when the call connects, so prepare to be patient.

Can You Screen Record FaceTime On Android?

This may come as a surprise for Android users, but Apple devices no longer bind faceTime. As a result, only PC and Android users can now FaceTime their interactions with one click. However, it is important to remember that you won't be able to start the call directly from Android Deviceh Rather, the iOS users send you the link to FaceTime call through any device. And you can join the meeting by simply clicking on the link, subsequently recording the call if you need to.

Also, currently, only the Chrome browser supports this extended support to Android users. You can start the call by the following process.

facetime
Source: https://www.iphonehacks.com/

Similarly, if you are a Mac user, the process receives the same.

But then how to record screens on FaceTime from Android devices? Well, that's what we will cover next.

Screen Recording On FaceTime With Sound On Android:

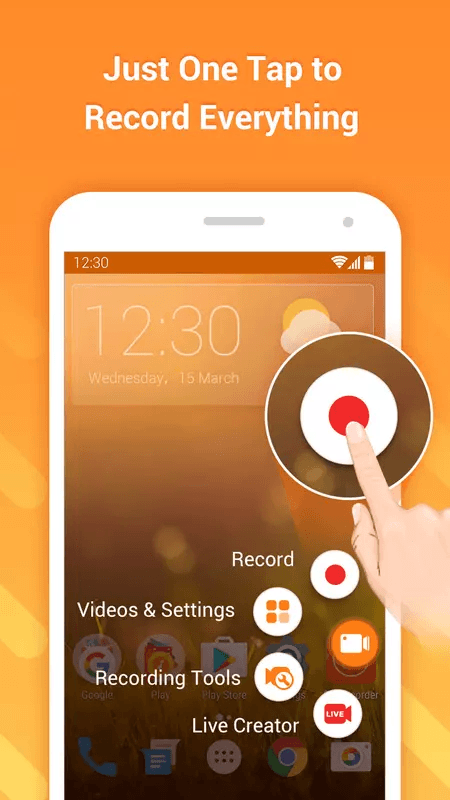
The good news here is that there are numerous screen recording apps on Google Play Store that let you screen record FaceTime calls, And the process is as simple as it gets. Just download the screen n recording app and initiate the recording once you have joined the call.

Screen Recording Apps: How To Screen Record On FaceTime With Apps?

There are tonnes of options to help you record FaceTime calls on Android. This can be through apps. We have mentioned two such apps for you to start with. Both of them record screens on Android devices with sound.

Screen Recording Apps
Image From Unsplash By Luca.

DU Recorder

A free application, the DU Recorder, can be downloaded from the Google Play Store. You can record HD videos and access basic editing options, like trimming the ends of the videos. Furthermore, the editing options here enable you to make GIFs from your recording and share the recordings online on social media platforms.

DU Recorder, a Screen Recording Software for an easy solution to: How To Screen Record On FaceTime.
Image From: https://du-recorder.en.uptodown.com/android

Moreover, you can change the recording settings alongside frame rate adjustments to improve your recording quality; However, this app only allows external sound to be used as input.

AZ Screen Recorder

AZ screen recorder supports recording audio internally from your android device. Moreover, the free app action allows screen recording up to 1080p without time limitations.

AZ Screen Recorder Logo of a Video Camera.
Image From https://www.toneden.io/

AZ Screen Recorder also comes with a Facecom to support video recordings like capturing interviews. It also has some editing g options to polish the content and lets you share online directly.

Screen Recording On FaceTime With Sound Using Software:

Honestly, the change in the methods for different devices may sometimes be overwhelming. This is where Software steps in effortlessly. Some of the main advantages of using software to screen record on FaceTime with sound include:

If you are wondering how to choose the software to screen record on FaceTime, keep an eye out for the following features:

How To Screen Record On FaceTime With Sound: FAQs.

Since we have covered an extensive load of information on this subject, it is important to address the FAQs Here are the most common queries:

Is It Legal To Screen Record On FaceTime?

Though the legality of screen recording on FaceTime varies in different states, the easiest way is to seek the other party's permission before recording. However, if suppose you cannot take permission, it's best to check the state laws and see if they require dual consent for recording. As long as you are aware of the law and well within it, there isn't any legal barrier for you to screen record.

Is The Other Person Notified If I Screen Record On FaceTime?

Fortunately, no. Though the other caller might be notified if you take screenshots, they won't know if you record the screen on FaceTime.

What Can Be Done If I Forget To Enable The Audio Function?

You have to rerecord it. Unless you do not follow the aforementioned steps and turn the function on, the audio won't be recorded. Neither will you be able to retrieve the sound. However, this is per inclusive if you want to add an external voiceover since the video file will be saved in your Photos app without any audio.

Final Thoughts

Since FaceTime facilitates instant communication with loved ones or your business's needs, there is no fuss about the process!

However, we have tried to completely break down the process to guide your dilemma regarding "How to Screen Record on FaceTime with sound?" In fact, you can have any device to screen record now.

But if you are looking for a platform that not only enables screen recording on FaceTime with sound in the same way for all interfaces, we suggest trying out third-party software. One of the best video recordings and sharing platforms is VideoSends, With ex remedy interactive features and complete flexibility. So you will have the easiest recording experience and an enriched one.

Not to mention, the platform accommodates team collaboration for your businesses. It also has options like live sharing, which comes with unlimited space and tonnes of customization options. So check out the website and Get Started with your free trial today!

How To Record Screen On Your iPhone: The Easiest Guide

Have you ever wanted to record your game? Or make an iPhone how-to tutorial, or maybe save a portion of a live stream? Fortunately, iOS includes a new control center feature that allows you to record what you're doing on your screen.

Record Screen On iPhone
Source: Pexels

Knowing how to record your iPhone screen has a variety of applications, ranging from practical to entertaining. For example, if you're trying to show a friend or family member how to use an iPhone feature, a screen recording provides a handy visual representation of what to do.

However, Apple made the screen recording a simple process. But still, if you’re struggling to record your screen on iPhone, check out this article to find out the most accessible guide to record screen on iPhone.

Table Of Contents

TLDR

What Is Screen Recording Feature?

Screen recording allows you to record what is happening on your screen for later viewing. Capturing what happens on your screen can be helpful for a variety of purposes.

Whether you're watching a presentation or webinar that you'd like to watch again or creating a video game tutor, you can do that with the screen recording feature.

When it comes to using the screen recording feature, you can use the built-in feature of the device or download a tool for it.

How Long Can You Record A Screen?

You can screen record endlessly with the right screen recording software. You can continue to capture the action as long as it is visible on your screen. However, this does not always imply that you can record hours and hours of footage. Consider the following:

1. The file size

Large files are complicated, difficult to send, and challenging to store. The longer you record your screen, the larger your file will be, which may cause issues with future playback.

2. Resolution

Depending on the settings on your monitor and video recorder, you can record your screen in various resolutions. If you record your screen at a high resolution, you may notice that your file size grows more quickly.

3. Storage space

How much information can you store? Some free screen recording software limits the file size you can save to the platform. In other cases, your storage solution's limitations may limit your recording.

Before you begin recording, check the specific limitations of your screen recording software. Make sure you have a backup solution in place to allow you to continue capturing your screen for as long as you need.

What Are The Benefits Of Screen Recording?

There is a variety of benefits of screen recording. Here are some benefits of screen recording that you might consider:

benefits of recording screen
Source: appscreenrecorder.com

Show A Procedure Clearly

When your mother calls to remind you how to post a video to Instagram, you will walk her through it. But, instead, you are going to record yourself doing it and send it to her.

Then, when she forgets, she can just watch the video.

You can also use screen recording to assist a customer who has contacted your support team with a software question. You can help a colleague who is learning a new process and a variety of other situations.

Record A Software Bug

When you face an error or a bug in the app you're using; you sometimes find it difficult to describe what you were doing at the time. You no longer have to do this now.

Instead, you can record a video of what you're doing when the error occurs and send it to the app's creator to assist them. So, they can determine what's wrong.

This is also beneficial to your internal development team. For example, if you're working on an iOS app with a group, screen recordings can be a great way to show the rest of your team what's going on to get that fix it out as soon as possible.

Show Off New App Features Or Functionality

Whether you've developed a new app or simply updated an existing one, video is an excellent way to demonstrate the features you're most proud of.

You can do a series of short videos highlighting individual features or a more detailed version. In either case, you can demonstrate how your app works.

Furthermore, iOS's ability to capture voiceover allows you to explain what you're doing.

Provide Feedback

The new screen recording feature in iOS allows you to do even more. You can now review documents and images and provide feedback from almost anywhere.

You can record your thoughts and changes while reviewing instead of typing them out in an email or text. Then, whether you record narration or let the visuals speak for themselves, you can be confident that your recipient will understand precisely what you mean.

Make A Video Of Yourself Playing A Game

Do you want to share your victories with the rest of the world? You can screen record and show people how you play a game.

So, now that you know why you'd want to record your device's screen, it's time to learn how.

How To Record The Screen On iPhone

Screen recording was introduced in iOS 11. So, you'll need that version or later to capture what's happening on your iPhone screen. That's not a problem, because the most recent version of Apple's phone software, iOS 15, can even run on 2015 devices.

record screen on iPhone
Source: cnet.com

In the upcoming sections, we have described how to screen record on different versions of the iPhone:

Turn On Screen Recording

The first step is to turn on the screen recording on your device. Screen recording on your iPhone is simple, but it is not automatically configured to record out of the box.

Before you can begin screen recording on your iPhone, you must first enable or configure the screen recording feature. If you have an iPhone from a generation after the iPhone 6, you must first ensure that your iOS is up to date to iOS 14. So after that, simply follow the steps below to enable screen recording on your iPhone.

1. Go to Settings.

2. Open Control Center.

3. Tap Customize Controls. If the Access Within Apps switches is not enabled (green), tap to enable it.

4. Now scroll and find the Screen Recording option.

5. Tap on the plus sign next to it. You’ll now see the Screen Recording option move to the Include section.

Record Screen On iPhone X, XR, 11, 12

Once you are done enabling the screen record function on your iPhone, it’s really simple to record your screen.

Let’s see how you can screen record on all variants of iPhone X, XR, 11, and 12:

1. Open the iPhone control center and tap the Screen Record icon.

2. Allow 3 seconds for the recording to begin. That's all. Everything on your screen will now be recorded.

3. Tap the red status bar at the top left of your screen to stop recording. Then press the Stop button. Your recorded video is saved to your photos automatically. You can also open the Control Center by swiping down. Then tap the record button again to stop recording your screen.

Record Screen On iPhone SE, 6s, 7, 8

If you want to screen record on an older generation iPhone because you might have an older version of iOS.

In case you have iOS 11 or 12 and are using iPhone SE, iPhone 6 or 6s, iPhone 7 or iPhone 8, here’s how you can record your screen.

Record Screen On iPhone SE, 6s, 7, 8

1. Open the iPhone control center and tap the Screen Record icon.

2. Wait 3 seconds for the recording to begin. That's all there is to it. You will now be recording everything on your screen.

3. To stop recording, tap the red status bar at the top of your screen. Press the Stop button. You'll see a notification that your video has been saved to your photos. To view your video, tap this notification. You can also open the Control Center and tap the record button again.

Record Screen With Sound On An iPhone

When you record your screen, audio from your iPhone is automatically recorded. You can include a voice-over or narration with just one simple setting in your recording. Let's look at how to screen record with sound on an iPhone.

record screen with sound
Source: iphonefaq.org

1. Open the control center by swiping down (or up, depending on your iOS) from the top-right corner of your iPhone and long-pressing the Screen Record icon.

2. Select the microphone icon. It'll turn red. Then, press the Start Recording button.

You are now recording both your screen and audio. Begin speaking along with it to record a how-to video or any other type of video you want.

3. To stop recording, tap the red status bar in the upper left corner of your screen select Stop. Your recorded video is saved to your photos automatically. To stop recording your screen, open the Control Center and tap the record button again.

Wrapping Up

By now, you already know the advantages of screen recording your device.

Now that you've grasped the concept of screen recording on your iPhone, are you looking to personalize it? If you are, then VideoSends can be the perfect solution for you.

VideoSends is the easiest screen recording software to record anything on any device. In addition, it allows you to customize the video and share it within seconds.

So, what are you waiting for? Sign Up now to quickly record your video, edit, and share instantly!

Top