It is not uncommon to experience a situation, where your saved recording displays nothing but a black screen. In fact, you may later discover how you can’t even take screenshots of a certain application or webpage. In most cases, such videos may have certain restrictions imposed upon them. But then, there are a few ways that you can use to overcome such barriers. However, before taking on such protected videos, let us first understand why some content may be restricted.
As you might predict, certain applications or videos may contain sensitive information. Hence developers specifically restrict screen recording and prevent content leakage.
You are most likely to find such security features for instances where:
Apart from technical issues and guidance support, you might also require such content for business use or any similar purpose. And thus, we have brought in the tried and tested methods to get you going.
A safe and fast approach, installing the restricted app enables you to record screens of protected videos. However, this method is suited for android devices (5.00-10.00 versions) only. As a result, works best on apps rather than web pages, emails, or blogs.
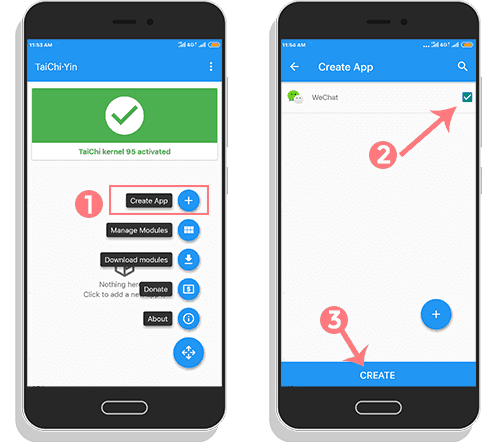
All you have to do is follow the given steps:
Install DisableFlagSecure on your device after downloading the app. Now the app lets you capture screens and take screenshots of protected content. However, if the latest version( provided here) doesn't work on your device, you can check out the previous version.
Next, install the updated version of an app called the Xposed Tai-Chi on your mobile. Accordingly, this app enables you to run android app files virtually, similar to plugins. Therefore, you can now successfully record screens despite restrictions.
Go to the Tai-Chi application, open <Manage Modules> and click on the checkbox corresponding to “DisableFlagSecure”.
Click on <Create app> from the Tai-Chi menu. This prompts open the list of apps on your smartphone. Hence, you can now simply select the app which contains your protected videos.
Once you select the app that has restricted content, the Tai-Chi app automatically uninstalls the original application. Subsequently, Tai-Chi will give you the option that reads:< Ready to Install>, next to the app you chose to record. Select this option to begin a new installation and your work is almost done.
With this new or duplicate version of the protected app, you can then screen record protected videos. Thus, the restriction is avoided and you have protected videos on your mobile saved.
A technology that mirrors screens of one device on another screen mirroring is a fascinating way to screen record protected videos.
There are two subsections to this section: You can opt for the phone to phone or phone screen mirroring. Otherwise, go for phone- to-windows screen mirroring depending on the availability of your devices.

Now, if you have two mobile phones at your disposal, you can simply mirror screens from one phone to the other.
Let's say, you have two phones A and B. In order for this method to work, both phones must be connected to one network. This can be your central WiFi. Other than that both A and B should have the same screen-casting application installed. You can use LetsView, AirMirror,
or VideoSends, all of which are supported on ioS and Android. On the other hand, if both your devices are ioS, you can also go for ApowerMirror.
The options for mobile-to-mobile are immense. You can mirror amongst android and ioS devices and even cross-systems.
In a nutshell, the basic framework remains similar for android and ioS systems.
Download and install the apps. Allow the screen recording option according to the system of your mobiles Start your chosen application. Suppose you want to mirror A on B. Search for device B on A and select it. Hit record on A and the screen will be mirrored on phone B.
Furthermore, if you are looking for a solution that does not require an internet connection, the ScreenShare app may work well. However, their services are only limited to Android at the moment.
Good news for all Windows 10 users! Windows 10 comes with a built-in property named the “Connect” app. This app facilitates screen mirroring from phones to your Windows device.
Thus you can use simply use any recording platform to screen record using this app. But first, ensure that both devices are connected to the same Wi-Fi network.
Then use the Windows Search box to search for the feature “ Connect” and click on the app. Next, click on the display where it shows “ Projecting to this PC”.
Following this prerequisite, search for “Cast” or “ Wireless Projection” on your phone. Click on to enable the feature and consequently, your PC’s name will be detected on your phone. Connect to your PC. Simultaneously, your PC will receive confirmation of this connection. Tap on“OK”.
Choose a screen recording software that you want, for the Windows 10 device. You might have a favorite, but you can always try platforms like RecMaster or VideoSends to begin screen capture.
Third-party apps like Zoom, Slack, or Skype let you share the screen on other devices. You have the flexibility of sharing partial or complete screens of your desktops or phones to a different device. You may use any screen recording software to assist you in this step. Hence you can record the screen share on the other device without breaking any restrictions. Thus, recording protected videos easily.
If you are wondering how to initiate screen-sharing on these apps, the process is quite simple. For instance, Zoom meeting controls show <Share Content> for iOS and<Share Screen> for other systems like Android or Linux.
Similarly, for Slack, click on the camera icon on the channel or direct message thread. Hit record or select a different camera and microphone from settings to proceed with the screen capture.
On the other hand, Skype keeps its screen recording feature in the menu for desktops. Click on the three-dotted icon and hit choose “Start Recording” and your screen sharing is underway.
Alright, let's start with rooted and non-rooted devices. Word of caution here though, do not confuse rooting with “jailbreaking” of an iOS system. Rooting is the process of unlocking the Android machine to access user privileged control or simply put, root access. Similar to administrator facilities on Windows or Linux-based devices. Most of the time, users want to go for rooted android devices, to avoid certain limitations on the system. Or even just to install third-party apps.
Moreover, you might not know the rooting status of your android device. Nonetheless, you can easily check this status by installing apps like Root Checker or Terminal Emulator. Both are pretty easy to use.
For non-rooted devices, you can very easily go for third-party apps and screen record protected videos. Some applications can directly record screens along with proper sound input. For instance:
On the contrary, if you already have a rooted android device, you can download any of the following apps:
However, if you have a non-rooted phone, please do not attempt to root it. If you have limited knowledge about the process, avoid trying it. Especially since rooting your devices may lead to invalidity of the manufacturer’s warranty.
If you are still looking for a simple way to screen record protected videos on mac, this is it. iTunes Video Recorder is a fast and painless way to record iTunes movies, TV shows, or music videos stream. Not only that, you can screen capture DRM-protected content, record games, video podcasts, and webinars. The saved video will then automatically be accessible on your device.
You have the choice to download the free video recording software Movavi for Mac. The tool is compatible with any model. Or, use the in-built software on macOS Mojave and later versions.
First choose the app or window of the protected videos, that you wish to screen record. Select shift command 5 which prompts the systems screen recording tool.
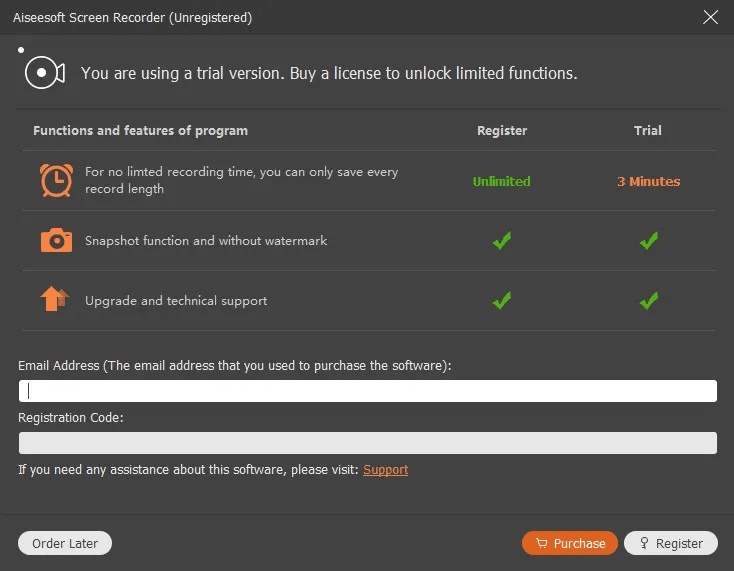
The pointer switches to a camera. It's best to register on iTunes Video Recorder, but you can start with the trial version to understand the working mechanism first.
Press the audio recorder and start recording by clicking on the red button. Next, launch the movie recording software on iTunes. Choose the screen you want to record or you can press “Record” seen in the onscreen controls. If you are cool with the whole screen for your screen record, click on any portion of the screen. But for recording a part of the screen, doodle on the portion that you want to capture and click “ start recording” only for the specified portion.
You will see a control bar on the bottom of the screen. Hence, you can navigate the recording, pausing and stopping as necessary. However, if you are looking for a longer duration of screen capture, go for the registered version.
You can also download the FoneLab screen recorder for Mac.
Well if you were stuck or frustrated with the protected videos, now you have multiple ways to solve the issues. And no matter which devices you have or which kind of system you use, you can easily work your way around with screen recording protected videos.
However, for businesses, a raw, unedited video may not be of any use. Consequently, your effort in screen recording protected videos, may just be the start of the journey. If you want to go the extra mile and add a professional touch to your content, personalization is your answer. And what better way to ensure this than a platform that guarantees both screen recording and personalization at the same place? Then VideoSends is perfect for you!
With VideoSends you can virtually screen record on any device may that be Android, Mac, Linux, or iOS. What are you waiting for then? Sign up today and put an end to all your worries!